In this project out job was to improve the T9 automoblox truck with new parts using Autodesk Inventor Pro
STEP 1: Identify the Problem
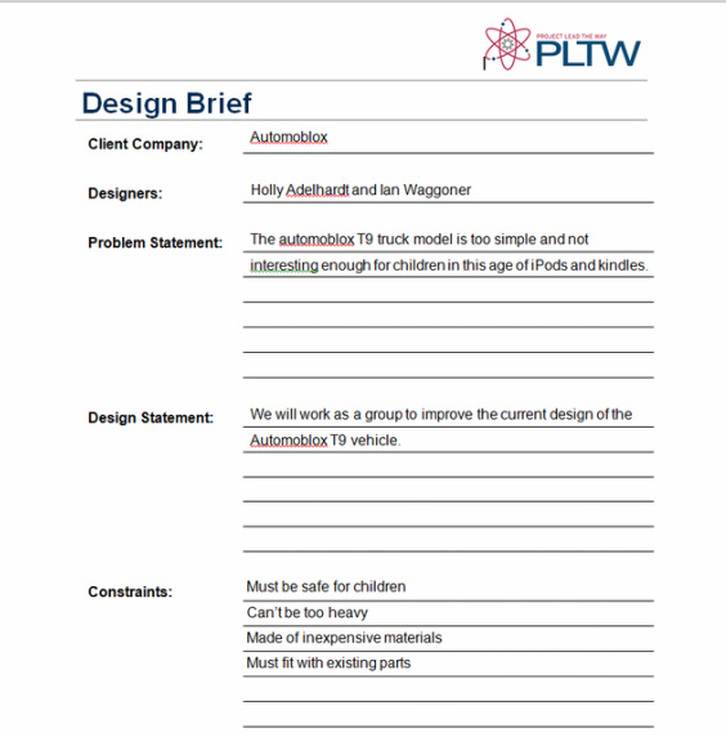
Design Brief
Before we could even start brainstorming we had to create a design brief and explain why and how we were going to improve the T9 Automoblox truck. Basically we said the truck was too boring and lacked personality.
Step 2: Generate Concepts
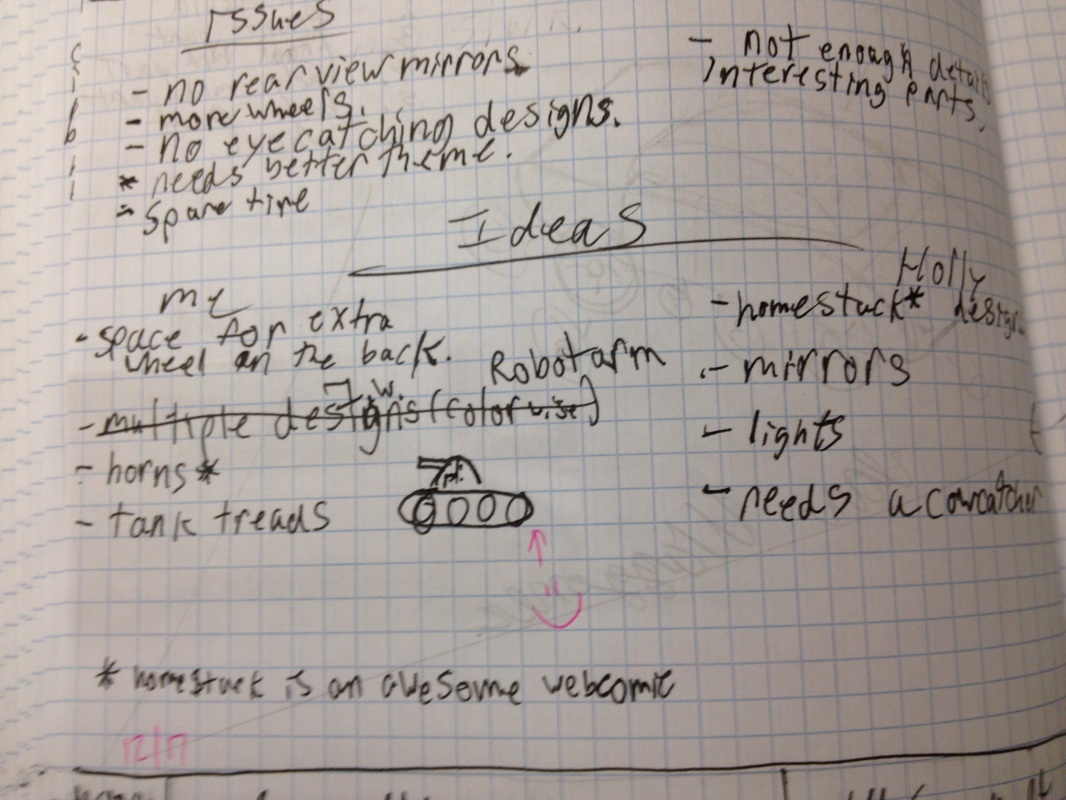
Brainstorming
Now that we new what we were supposed to do, we just needed to know how were going to improve the car. So we started brainstorming and writing down ideas in our engineering notebooks.
Now that we new what we were supposed to do, we just needed to know how were going to improve the car. So we started brainstorming and writing down ideas in our engineering notebooks.
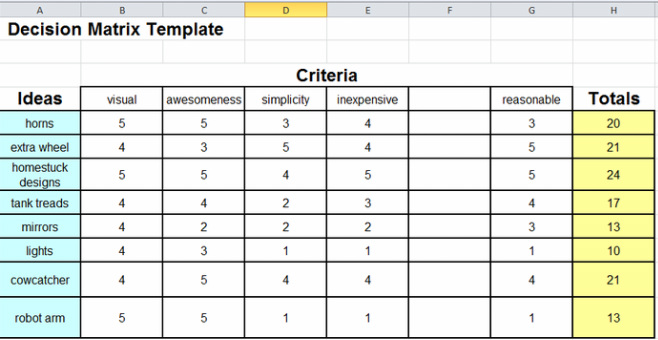
Decision Matrix
Once we had a good amount of ideas we put them into a decision matrix and measured each based on its visual appearance, the simplicity of the part, how expensive the part would be to make, how reasonable adding the part would be, and personal preference (labeled as awesomeness)
Once we had a good amount of ideas we put them into a decision matrix and measured each based on its visual appearance, the simplicity of the part, how expensive the part would be to make, how reasonable adding the part would be, and personal preference (labeled as awesomeness)
Step 3: Develop Solution
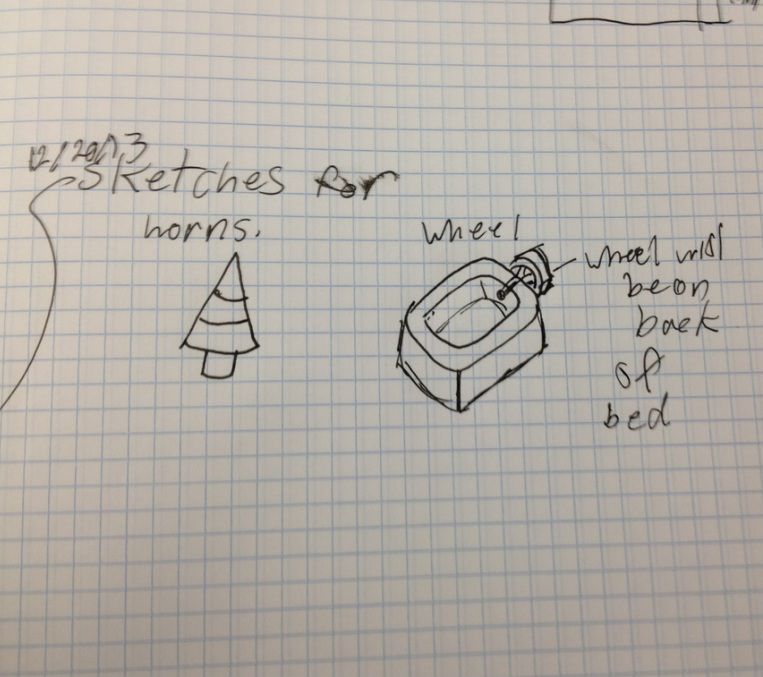
Brainstorming Sketches
After coming up with ideas we also created a few sketches of the parts we thought we were going to be making.
After coming up with ideas we also created a few sketches of the parts we thought we were going to be making.
Step 4: Construct Prototype
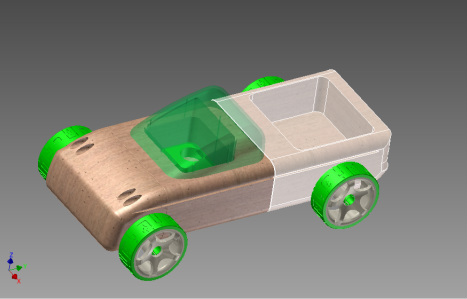
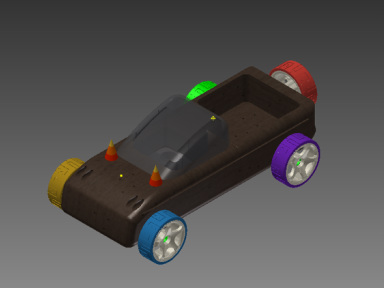
Assembled Before and After
|
|
Improving the Car
Based on the decision matrix and the numbers given for each, we decided to do the horns, extra wheel, and the cowcatcher.
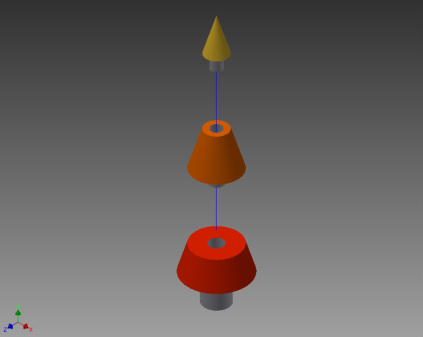
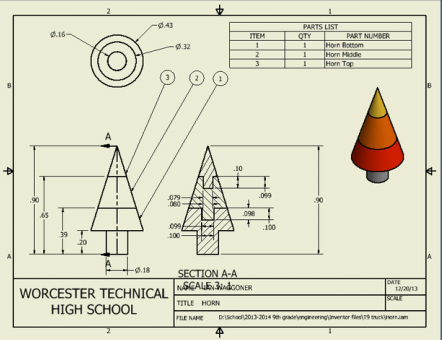
The horns were fairly simple to make, it was comprised of three separate segments; each getting smaller and tapering to a point.
Based on the decision matrix and the numbers given for each, we decided to do the horns, extra wheel, and the cowcatcher.
The horns were fairly simple to make, it was comprised of three separate segments; each getting smaller and tapering to a point.
|
|
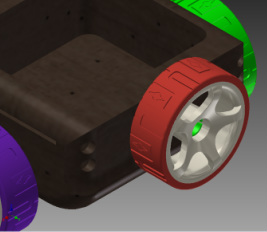
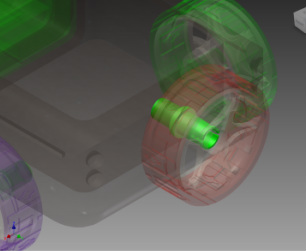
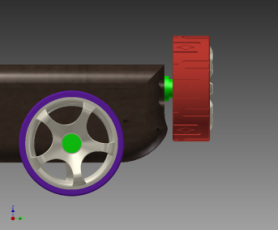
Extra Wheel
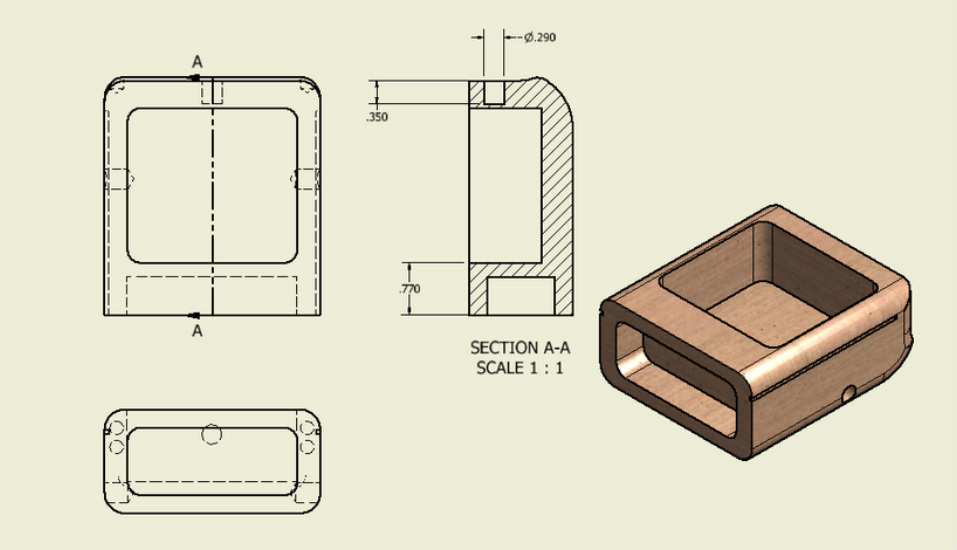
For the extra wheel we added a new hole on the back of the truck bed. we used the other axle peg holes for reference and made the back hole the exact same size. also we moved the depressed bed away from the back edge to accommodate the length of the hole.
For the extra wheel we added a new hole on the back of the truck bed. we used the other axle peg holes for reference and made the back hole the exact same size. also we moved the depressed bed away from the back edge to accommodate the length of the hole.
|
|
|
Step 5: Presentation
Step 6: Reflection
In this project we had to work together with our partner. We collaborated on ideas, had to decide on which was best, and use our time wisely. We didn't do so well on using our time wisely though.
We were set back a little bit when my partner's computer crashed and she lost all the work for that day. A valuable lesson: save EVERY SINGLE opportunity you get.
Also we should have spent more time on more practical things, things that actually made sense to put on a truck.
Overall this project was fun and really tested our skill with Inventor pro. Although, I wish we could have had more time to think of new improvements and other things.
